After going through the important process of planning out all the tasks and related scheduling for your initiative, it's time to help your colleagues have an easy time keeping track of all the comings and goings of the project. You can send automated gentle reminders to task assignees, and they can in turn make updates to their tasks to show all the progress they're making. And remember to check reports and dashboards to see everyone's activity in one convenient place.
Manage Task Notifications
There are optional project notifications we can use for task assignments, tasks due soon, and tasks overdue:

Update Tasks
Members of the project team who have tasks assigned to them can make updates to task progress as progress occurs. By clicking on empty space to the right of a task name in the task list, they can update the task status, add additional task description details, a checklist to break the task down into smaller parts, flag tasks that are of particular importance (or are in trouble), add comments with @mentions to push emails to team members with updates or questions, and attach files to the task and project library.

Change Task Progress

Flag Tasks for Attention
You can flag a task for attention by clicking into the task and setting the Flagged option in the task pane. This will set an indicator icon (flag) next to the task.

Add Checklists to Tasks
There may be times when you would like to break a task down into a series of smaller steps - Project Central allows you to do just that with the Checklist feature. Bring up the Task Side Panel, click into the Details tab, scroll down to the Checklist section and enter a new Checklist item:

You also have the option to copy multiple items from a spreadsheet column and paste them all into a Checklist simultaneously. After initiating the paste into a single cell in the Checklist you'll be presented with an option to create separate items.
Promote a Checklist Item to a Task
You can decide at any time to convert a checklist item to a task. The converted task will be placed under the task the checklist item was originally part of (except in the Board view) and will maintain its original status. To promote a checklist item to a task:
- Open the Task Side Panel of a task and click to the side of a checklist item.
- Click the Promote to Task button.
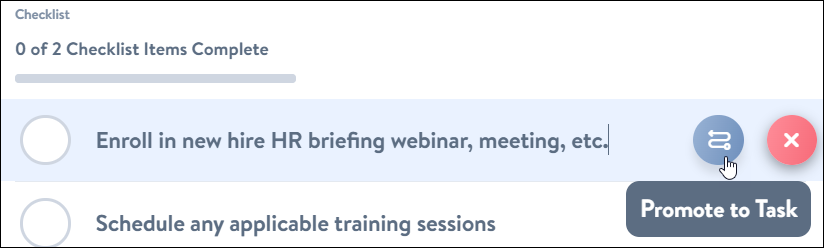
- Click Yes to promote the checklist item to a task.

Add Comments to Tasks
Comments can be added from within the Task Side Panel. Comments help keep team members fully informed on how important aspects of a project are proceeding. If you would like to direct a comment to a specific Project Central user, use @ to mention them, and they will then be notified of the comment by email.

Add Files to Tasks
The team can also attach files (already in the Project Library) or upload new files (to the Task and by extension to the Project library), from within the Task Side Panel:

Monitor Project Activity
The Activity Feed provides transparency for changes made within the project over time, and displays who made the changes. This type of ongoing data flow takes the guess work out of knowing what is going on within the project, and allows the team to have very open, honest, and productive team meetings.

View Tasks on an External Calendar
Users can one-way sync their My Tasks list of tasks (only those with Due Dates) to an external calendar of their choice with iCal export. Each task will appear as an all-day event on the Due Date of the task. The calendar event includes a URL to open the task in Project Central's Task Side Panel. Note that this calendar connection will be ongoing and will reflect any new task information added to Project Central.
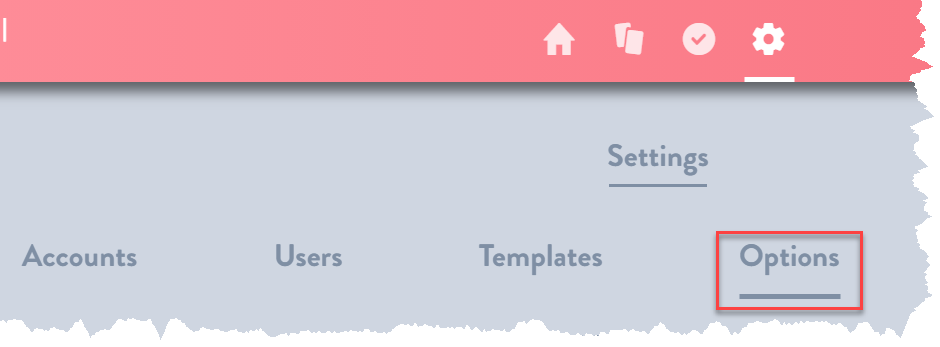
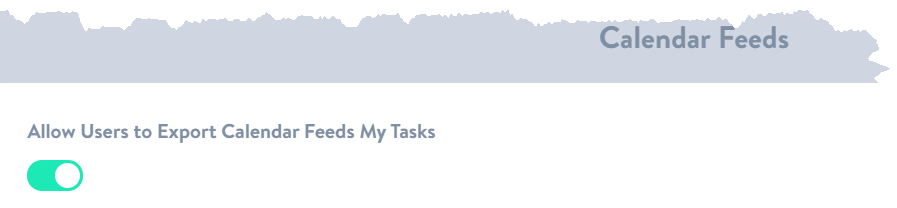
- Confirm that the account administrator has enabled the option Allow Users to Export Calendar Feeds My Tasks in the Calendar Feeds section of Account Settings | Options (a project manager who is not also an account admin will not be able to enable this option):
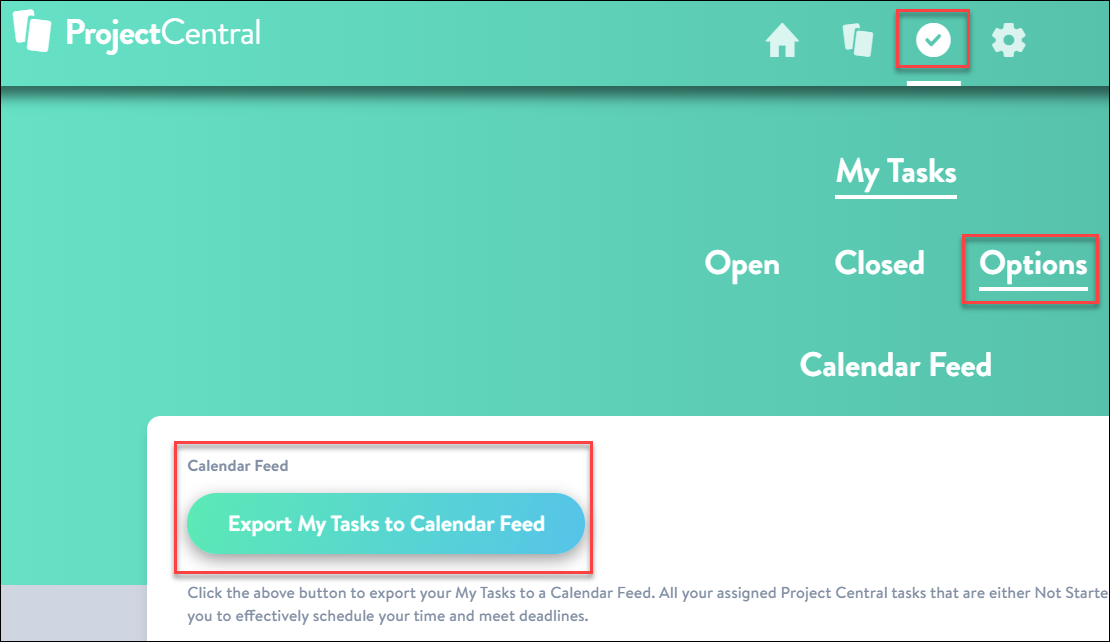
- Once enabled, team members can then visit the My Tasks | Options | Calendar Feed section of the account and choose Export My Tasks to Calendar Feed.
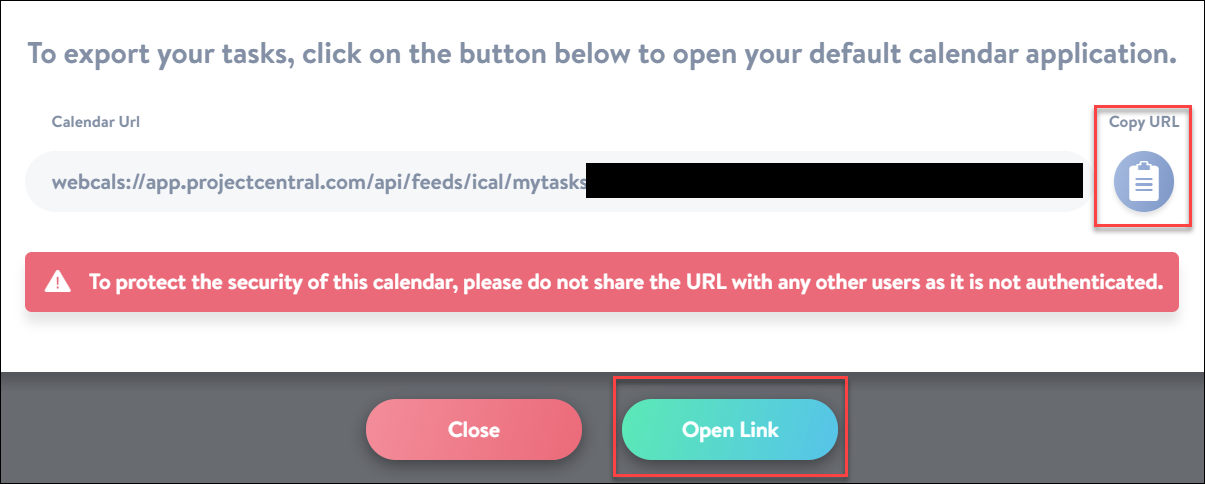
- Users will then be presented with two options for exporting to an external calendar:
- Click Copy URL which allows users to manually paste the link into the relevant section of their choice of calendar.
- Click Open Link which will automatically add the tasks to the default calendar set in their operating system.


Once enabled on an account level, Calendar Feed can be enabled or disabled on a project level by the project manager in the project's Options screen.
