It is often said that "a good start is half the battle" and so it is with managing a project. It can be very worthwhile to think through and agree the objectives and scope of the project with some of the stakeholders. It is also very helpful to invite your project team at this early stage to understand the boundaries of the project, so everyone knows what needs to be completed in order for the project to be considered a success.
Create the Project
When creating a new project, you have the option of either starting with a clean slate blank project, or you can get an even faster and more relevant start by using a template included with the product, or one that you or a colleague previously created yourself.
To create a new project:
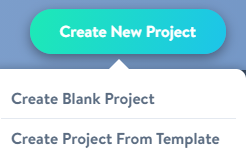
- Click Create New Project in the top portion of the screen and choose to create a blank project or to create a project from a template:
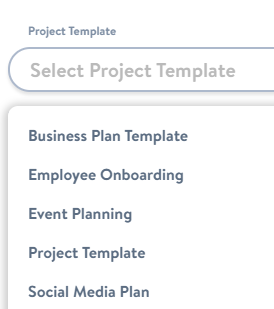
- If choosing to create a project from a template, you have many options to choose from! First you get to choose which previously saved template you would like to use with the new project. Simply click into the Select Project Template field and choose from the resultant drop-down list of templates:
- Next, using the tick-boxes, choose which template elements should be included in your new project:


All users assigned tasks within the chosen project template will receive email notifications once the new project is created unless this notification option was previously switched off.
Set Project Objectives
After the project is created, you can start filling in the high-level information about the new project, such as Project Title, Description, Start and End Dates, Current Status (Not Started, In Progress, Completed), Percent Complete, Project Health (On Track, At Risk, In Danger), Teammates, Project Tags, and Project Image. Upon completing the addition of project info, you'll be taken to the project's Dashboard.
- You can use rich text when filling in the text fields such as Project Title and Description.
- Adding project tags and a project image make it easier to find this project down the road.
Invite Team Members
What's a project without some extra hands? Invite team members who can be added to tasks and with whom you can share project updates.
Before adding team members post-project creation, we suggest you check out the project's Notifications settings, found within the Options screen, to determine if team members will get emailed or not:

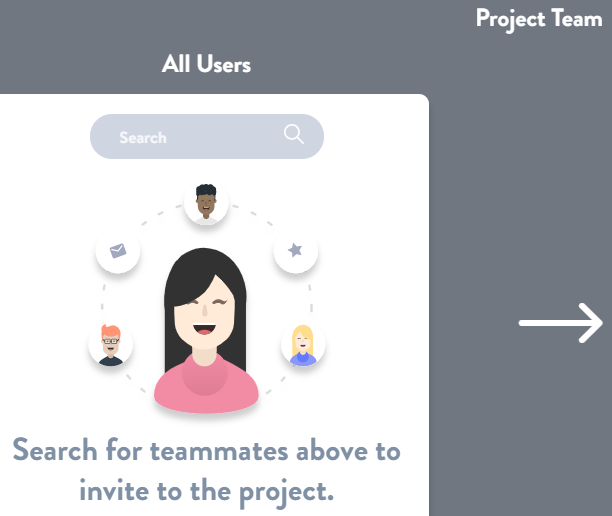
Now you're ready to start adding any new team members who were not already added when the project was first created:
- Click back to the project's Dashboard, scroll down to the Project Team section, click anywhere in the empty space in the section, and search for any teammates that are part of your Microsoft 365 environment, or add an external guest (see Guest Access instructions below).
- You can also add team members to your project by clicking into any task and assigning them to that task within the task's Details screen.

Guest Access
Users from any Microsoft Azure Active Directory can be invited to collaborate on projects. External project team members, contractors, or stakeholders can be added to individual (or multiple) projects without creating unique logins; they can be invited to collaborate by adding their existing Microsoft work account to your organization's Microsoft Azure Active Directory and they'll be able to work on your projects same as the rest of your team.
Users who do not have an Azure Active Directory account of their own, and have been added to your organization's Active Directory, can also be invited to collaborate on your projects using the Microsoft Teams app. Note that in this scenario they will not have access to the Project Central web app or any project files.
After the user has been added as a guest to your organization's Active Directory, you can then add them to your Project Central account and relevant project teams.

Guest users are easily identified with a key icon on the project dashboard.
Guest User Security
The guest user will not have any usage limitations within Project Central beyond specific admin permissions of the main account. The SharePoint permissions would be carried through from the Organization.
Note: A Guest will only be able to invite to a project those users that are already part of the Project Central account; they will not be able to invite other members of the organization's Active Directory, or members outside the organization.
Set Project Permissions
By default, all projects are accessible by anyone who has access to any project in the account. To make a project private so that it can only be accessed by the account Admin and team members that you individually specify within a project, click into the project's Options screen, and scroll down to Permissions and toggle the Private Project setting on or off.
![]()

You can also control access to project resources by linking your project site to a SharePoint Online library. From there, you can set permissions on files and folders giving you complete control over your project data.
Tag the Project
Once you get into the groove and start managing many projects with Project Central, Tags will be a great way for you to search for, and focus on, a subset of all those projects, grouped by your own set of attributes. Tags can be configured at either the individual project level, or at the account level by the account Admin.
Project-specific Tag Settings:


Account Tag Settings:

Enable Project Notifications
Task notifications can be configured at either the account level by the account Admin, or at the individual project level (overrides the account notification settings). You can configure emails to be sent to task assignees when tasks are assigned, due soon, and/or overdue.
Project Notification Settings:

What's next?